2K 360° WiFi Indoor Camera: Placement, Night Vision & Privacy
Smart 2K WiFi Indoor Security Camera with 360° View & Night Vision
A compact indoor camera can add peace of mind for apartments, home offices, nurseries, and pet areas—especially when it combines sharp 2K clarity, full-room coverage, and reliable night visibility. A 360° indoor camera is built to help you check in quickly, understand what’s happening across a room, and keep visibility after lights go out. Below is a practical guide to what to expect, where to place it for the best results, and how to keep everyday viewing smooth and secure.
What this indoor camera is designed to do
Indoor security cameras work best when they make everyday “quick checks” genuinely useful—clear enough to see details, wide enough to reduce missed areas, and consistent enough to rely on at night.
- Provide clearer indoor monitoring with 2K resolution for identifying movement and details in a room.
- Cover more of the room with a 360° viewing range, reducing blind spots compared with fixed-angle cameras.
- Support nighttime monitoring with night vision for low-light rooms, hallways, and entry points.
- Fit common indoor use cases: front door view from inside, living room, kids’ play area, pet zone, or a home workspace.
Quick feature overview
- 2K video: helps capture finer details than standard HD in well-lit areas.
- 360° view: intended to help see across the whole room by changing the viewing direction rather than relying on a single fixed frame.
- Night vision: supports visibility after lights go out; best performance comes from smart placement and avoiding reflective surfaces.
- WiFi connectivity: enables remote viewing on a compatible device when connected to a stable home network.
| Feature | What it helps with | Best room placement tip |
|---|---|---|
| 2K resolution | Sharper detail in daytime and good lighting | Aim toward the main activity area rather than a bright window |
| 360° view | Wider coverage with fewer blind spots | Place near the center of the room for balanced coverage |
| Night vision | Visibility in low light | Avoid pointing directly at mirrors or glossy surfaces |
| WiFi indoor use | Remote viewing and flexible placement | Install where WiFi signal is strong and stable |
Placement tips for a true 360° room view
A 360° camera can only “see” what isn’t blocked. Small changes in position—height, angle, and distance from walls—often matter more than expected.
- Choose a vantage point that “sees” entrances first: interior-facing toward a doorway or main hallway often provides the most useful coverage.
- Mount higher when possible: elevated placement usually improves the usable viewing area and reduces obstructions from furniture.
- Avoid backlighting: pointing directly at bright windows can reduce clarity; instead angle slightly away from direct glare.
- Keep it away from constant motion sources: ceiling fans, moving curtains, or TVs can create distracting scene changes in view.
For most rooms, start by placing the camera about two-thirds of the way up the wall on the side that gives a clean view of the door and the primary activity area (crib, sofa, desk, or pet crate). Then do a quick “walk test”: move through typical paths and confirm the camera can follow the most important zones without furniture cutting off the view.
Getting the best night vision performance
Night vision is where indoor placement details really show up. Reflective surfaces and dirty lenses can make nighttime video look hazy even when daytime video seems fine.
- Test in real darkness: check the view after lights are off, not just in dim conditions.
- Reduce reflections: mirrors, glass frames, and glossy TVs can create flare or bright spots at night.
- Use gentle ambient lighting if needed: a small night light in an adjacent area can improve overall scene detail without overpowering the camera.
- Keep the lens clean: dust and fingerprints can soften night images more noticeably than daytime images.
If the camera is pointed toward a hallway, try angling slightly so the lens doesn’t face a mirror at the end of the corridor. In living rooms, shifting the camera a foot or two to avoid a reflective TV panel can make night footage more consistent.
WiFi setup and everyday reliability
For practical home hardening steps, review guidance from the Cybersecurity & Infrastructure Security Agency (CISA) on securing wireless networks. If multiple smart devices share the same router, it’s also worth scanning broader best practices from the Federal Trade Commission (FTC) privacy and security guidance, and the baseline capabilities outlined in NISTIR 8259A.
Privacy and safe indoor use
Who this camera fits best
In-stock picks for monitoring and everyday use
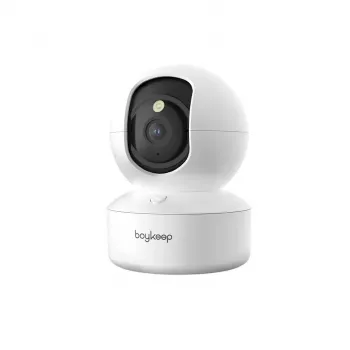
- Smart 2K WiFi Indoor Security Camera with 360° View & Night Vision — a compact option for full-room indoor coverage with 2K clarity and low-light visibility.
- Magnetic Clear Shockproof Case for iPhone 17 Pro & Pro Max — helpful protection if your phone is your primary device for live viewing and alerts.
- Magnetic 15W Wireless Car Charger & Phone Mount for iPhone 16–13 — useful if you check the camera while commuting or traveling and want a steady, powered phone setup.
FAQ
Does a 360° indoor camera eliminate blind spots completely?
A wider viewing range can reduce blind spots, but placement, furniture, and walls still matter. Centered and elevated positioning helps, and it’s best to test the full-room view after setup to confirm coverage.
How far can night vision see indoors?
Night vision range depends on room size, layout, and how reflective the surfaces are. For best results, test in real darkness, avoid mirrors and glossy screens, and consider mild ambient light if you need clearer detail farther across the room.
What WiFi connection works best for smooth live viewing?
Smooth viewing typically comes from a stable home WiFi signal where the camera is installed, with minimal congestion from other heavy usage. Keeping router firmware updated and placing the camera within strong coverage can prevent stuttering and dropouts.


Leave a comment